


Lenovo Thinkpad T440 laptop Keyboard Replacement
Step 1 Remove battery and fascia slide stops
Power down the computer and remove the external battery.
Using a pick tool, dental pick, tweezers, small flat screwdriver, or similar probe, carefully remove the two small rectangular rubber plugs located inside the battery compartment.
NOTE: Do not pierce or damage the plugs. They help provide spill resistance.
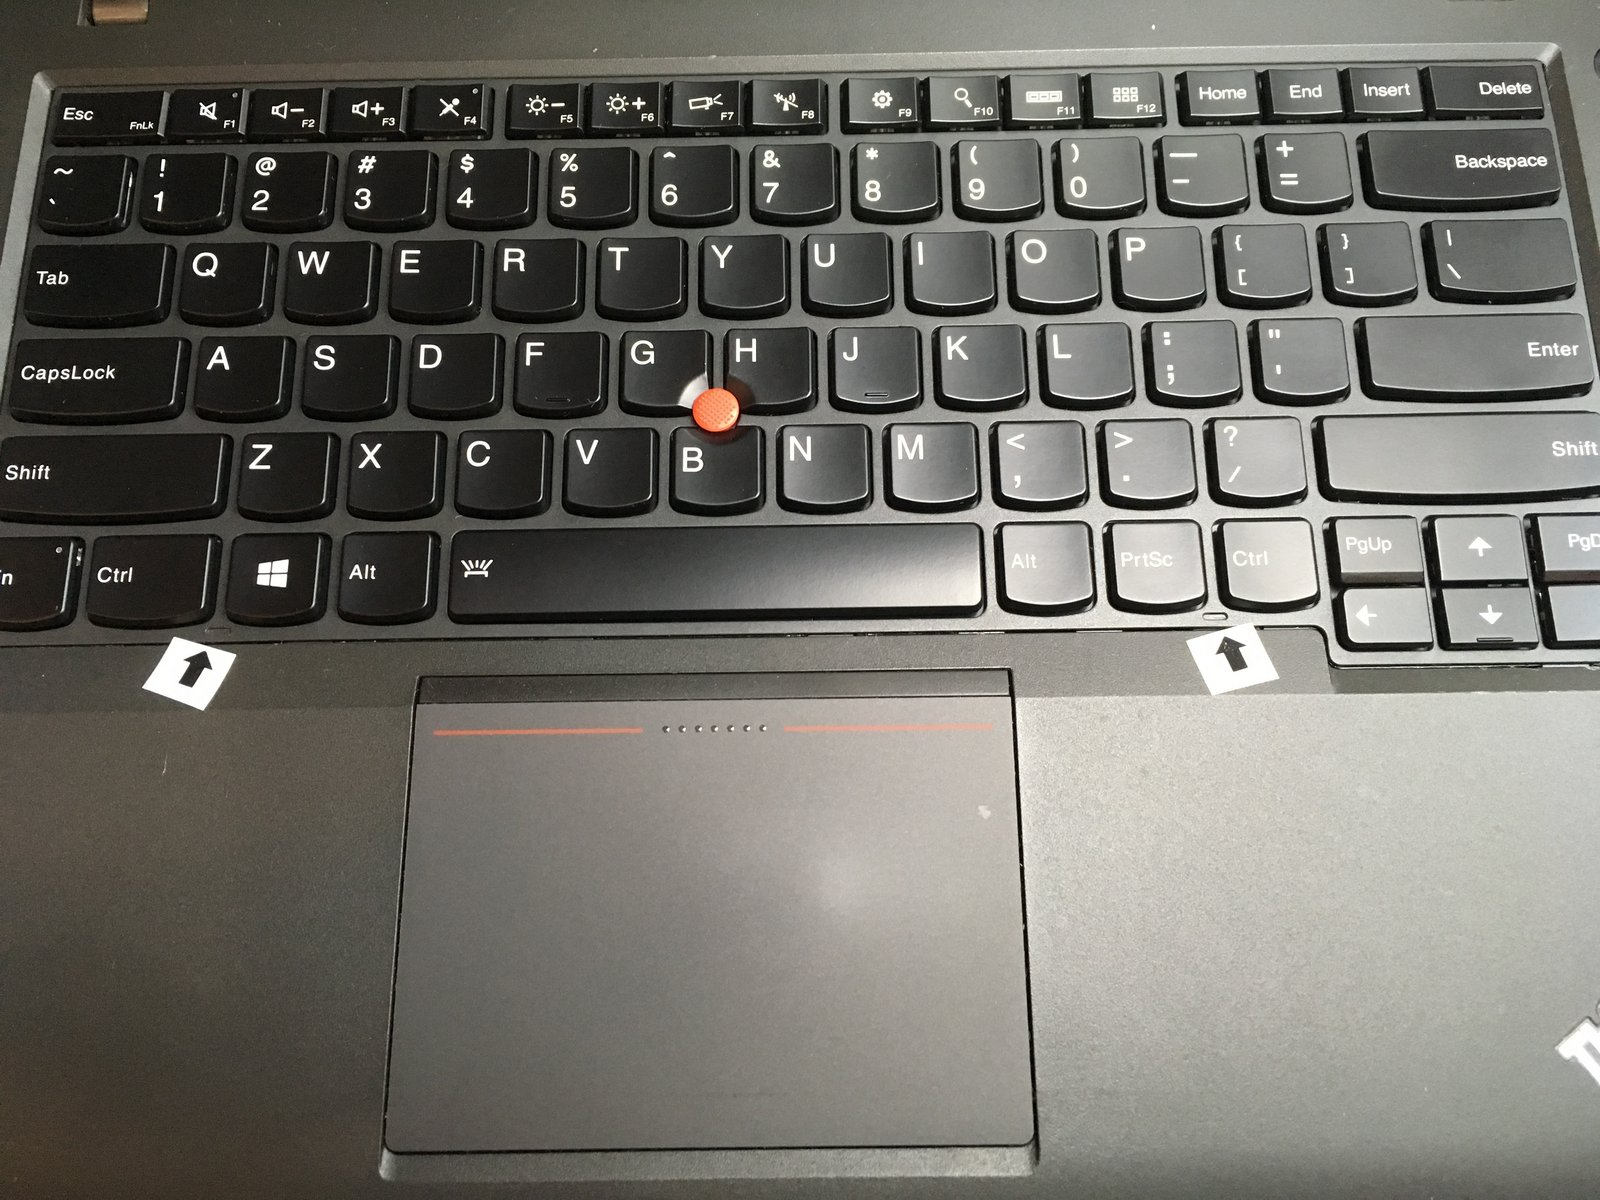
Step 2 Expose and loosen the screws
Locate the two small oval depressions in the keyboard fascia, just below either Ctrl key.
Using a flat screwdriver or narrow spudger in the depressions, slide the fascia up towards the hinges about 3mm (0.1 inches). The top edge slips beneath the bezel.
This exposes six Phillips screw heads, located in the 3rd and 5th rows of the key area. Loosen them.
Slide the keyboard up so the function-key-edge slips a small distance (3mm) beneath the keyboard bezel, freeing the arrow-key-edge.
Using a flathead screwdriver or spudger, lift the arrow-key-edge of the keyboard until it clears the bezel above the palm rest.
Slide the keyboard away from the screen, with the arrow-key-edge still above the palm bezel, until you have exposed a gap near the function-key-edge.
Lift the function-key edge and rotate the keyboard to expose its back. Adhesive on the ribbon cables may tug but will easily loosen with a gentle pull.
There is a large rubber grommet separating the keyboard from the motherboard. Its job is to help shield the motherboard in case a liquid is spilled into the keyboard.
The top edge of the grommet has a notch. Insert a fingertip or screwdriver and carefully pull the grommet loose. It is held in place by a weak adhesive.
Slide the grommet along the keyboard ribbon cable, towards the keyboard, and out of the way of the ribbon cable sockets.
NOTE: the thin grommet tears easily! This damage can reduce your laptop's ability to withstand a liquid spil.
There is a black plastic keeper bar holding the keyboard ribbon cable down. Slide a screwdriver just beneath the edge and carefully flip it up.
Slide the wide keyboard ribbon cable out of the socket.
There is another black plastic keeper holding the trackpoint cable in place. Slide a screwdriver just beneath the edge and flip it up.
Slide the narrow trackpoint ribbon cable free of the socket.
The keyboard is now free.

1 Comments
Great read! Thanks for sharing such useful information. If anyone is experiencing issues with their HP laptop, we’re here to help. We provide out-of-warranty laptop repair service at doorstep at an affordable price, ensuring convenience and expert support. Contact us at +91-7042640351 or +91-9891868324 for fast, reliable, and professional HP laptop repair solutions. Explore Our Service Areas
ReplyDeleteHP Laptop Service Center in Mumbai
HP Laptop Service Center in Delhi
HP Laptop Service Center in Gurgaon
HP Laptop Service Center in Noida
HP Laptop Service Center in Ghaziabad
HP Laptop Service Center in Faridabad
HP Laptop Service Center in Pune